
Congratulations Captain !
You have received your first command, now it’s time to properly outfit your first ship. We understand that when you’ve just started the game it might be a bit daunting, so here is a simple setup for you to use.
Just to recap, Star Trek Online’s starships in a nutshell:
Cruisers

Most versatile, but least maneuverable. Most device slots (like a potion quick-bar), most hull strength, and at Tier 5+ most weapon slots 4/4 – 4 front, 4 aft. However, they turn like schoolbuses, and get slower as you progress to bigger cruisers and carriers. There are simple and effective ways to overcome that however (hint: RCS consoles, 55+ engine power). Cruisers are considered good all-round ship which in capable hands can take and deal significant damage.
Escorts
The fastest and most maneuverable and can equip dual heavy cannons which have the highest damage (“burst”) output. At level 50+ as many weapons as cruisers, up to 5/3, plus a special “experimental weapon” (turret). But least device slots and weak hulls. Escorts are like fragile, high performance sports cars (aka “glass cannons“).
Science Vessels
Splits the difference of the other two in many ways. Decent shields, decent turn, but only 3/3 weapons. Right between cruisers and escorts in terms of power and device slots. Innate cloak detection and subsystem targeting (subsystem disables) and Sensor Analysis. Can do tremendous damage using “space magic“.
Full list of playable ships – Federation, Klingon, Romulan, Dominion, Cross-faction.
Basic Builds
To help you get started, here are some cookie-cutter builds which you can copy. The listed builds work on most Cruiser/Escort/Sci ships regardless of (sub-)type. I’m just listing two ‘key’ ranks where ships get more interesting.
You will receive a total of 6 free ships; one at Level 1/Lieutenant, Level 10/Lt Commander, Level 20/Commander, Level 30/Captain, Level 40/Rear Admiral, none at level 50, and last free ship at Level 61/Fleet Admiral. Except for the last Tier 5 or Tier 6 ship at Level 61, the previous free ships you will most probably discard – they won’t do for end-game content and be horribly outdated way before you reach the final end level 65 Fleet Admiral rank. So consider those your ‘training wheels’.
The listed equipment is standard and readily available as rewards, loot drops, from a regular ship equipment vendor and crafting.
You can change the weapon type from the ones listed, as the phaser and polarons are just examples. Just make sure you match weapons and tactical console(s). Always use the highest mark available to you, and if possible use Very Rare/Purple quality minimum (ask your fleet).
Especially for pure starter builds, torpedoes and mines are terrible, even when buffed. Don’t touch them untill you reach level 50+ when various consoles and traits make them usefull (of sorts).
Your Bridge officers are very important in Star Trek Online: they decide 1/3rd of your effectiveness in space and on ground. I’ll adress them after the following basic builds.
![]()
level 10 – Lieutenant-Commander (free Tier 2 ship)
( ENS – Ensign, LTN – Lieutenant, LTC – Lieutenant-Commander )
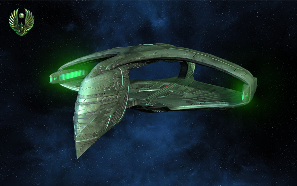
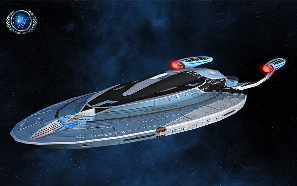
Tier 2 Cruiser (typical)
The mainstay of starfleet, or its equivalent in the Romulan or Klingon empire, this is a sturdy cruiser that can hold its own. Generally cruisers have a larger focus on Engineering powers for survivability, and have the slowest turn-rate. This can be fixed by adding an RCS (+turn) console however. Its energy beams have a wide coverage allowing it to broadside and basically hit hard from any angle. A tough ship-type that will serve you well.
Weapons 2/2 – 2 /2 ![]() Phaser Beam Arrays (phasers have a temporary disable proc)
Phaser Beam Arrays (phasers have a temporary disable proc)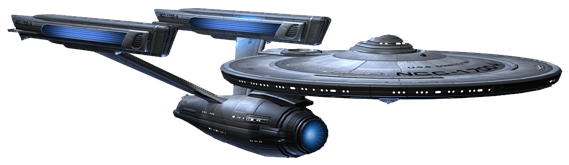
Bridge Officers:
![]() ENS Tac –
ENS Tac – ![]() Tactical Team I (+dmg) or
Tactical Team I (+dmg) or ![]() Beam Fire at Will
Beam Fire at Will
![]() ENS Eng –
ENS Eng – ![]() Engineering Team I (+Hull heal)
Engineering Team I (+Hull heal)
![]() LTN Eng –
LTN Eng – ![]()
![]() Emergency power to Shields I & II (or
Emergency power to Shields I & II (or ![]()
![]() Emergency pwr to Weapons I & II for dmg)
Emergency pwr to Weapons I & II for dmg)
![]() ENS Sci –
ENS Sci – ![]() Science Team I (+shield heal/buff)
Science Team I (+shield heal/buff)
Run the 2x copies of Emergency Power to Shields or Weapons back-to-back for max effect (congrats, you’re now using what is called a ‘Dragon‘ build).
Consoles
2 Eng – ![]() RCS console (+turn),
RCS console (+turn), ![]() Neutronium alloy armor
Neutronium alloy armor
1 Sci – ![]() Shield Emitter Amplifier (shield buff)
Shield Emitter Amplifier (shield buff)
1 Tac – ![]() Phaser Relay
Phaser Relay
Device slots – ![]() Subspace Field Modulator, (available at Level 11; provides +energy damage resist),
Subspace Field Modulator, (available at Level 11; provides +energy damage resist), ![]() Deuterium Surplus (available at Level 11; provides a speed/defense boost).
Deuterium Surplus (available at Level 11; provides a speed/defense boost).
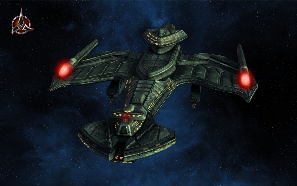
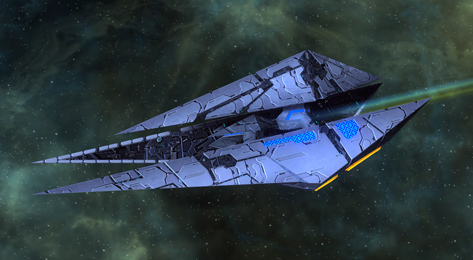
Tier 2 Escort (typical)
Zippy little ships, very fast, but fragile. However if it hits, it HITS. Timing is most important since it puts everything in that one perfect strike – and if it kills its target, it doesn’t need heals or fixes. Speed is its best friend for getting out of trouble (10+ km) and lining up behind its prey. Its dual heavy cannons are most efficient within a 5 km range.
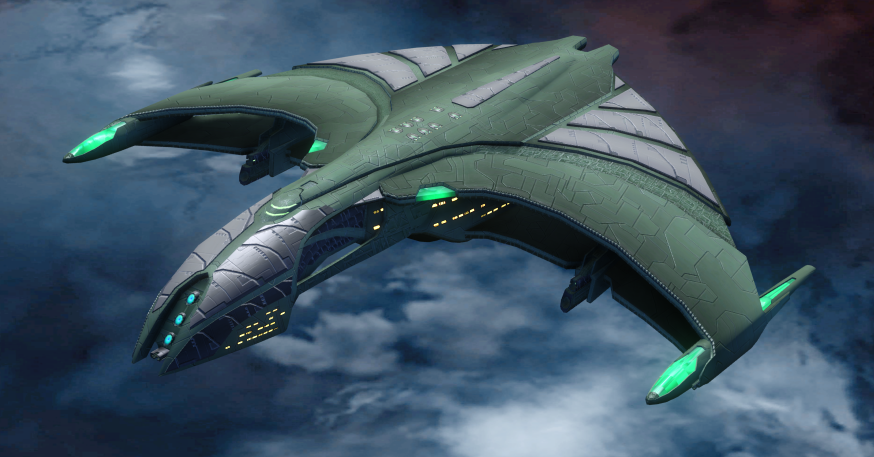
The Klingon Bird of Preys and Romulan Warbirds fall in the same category, and are vicious ships due to their cloaking technology. However, they pay for that ability by being even more fragile.
Weapons 3/1 – 3 ![]() Dual Heavy Phaser Cannons, 1
Dual Heavy Phaser Cannons, 1 ![]() phaser turret
phaser turret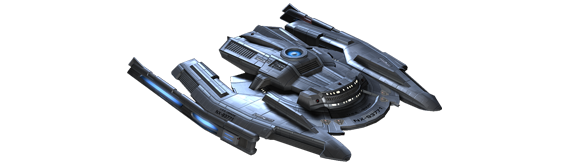
Bridge Officers
![]() ENS Tac –
ENS Tac – ![]() Tactical Team I * (+dmg +shield balance)
Tactical Team I * (+dmg +shield balance)
![]() LTN Tac –
LTN Tac – ![]() Tactical Team I *,
Tactical Team I *, ![]() Cannon Rapid Fire (single target) or
Cannon Rapid Fire (single target) or ![]() Cannon Scatter Volley (wide arc)
Cannon Scatter Volley (wide arc)
![]() ENS Eng –
ENS Eng – ![]() Engineering Team I (+hull heal)
Engineering Team I (+hull heal)
![]() ENS Sci –
ENS Sci – ![]() Science Team I (+shield heal)
Science Team I (+shield heal)
(* run both Tac Tms back2back for max effect)
Consoles
1 Eng – ![]() Neutronium Armor
Neutronium Armor
1 Sci – ![]() Shield Emitter Amplifier
Shield Emitter Amplifier
2 Tac – 2 ![]() Phaser Relays
Phaser Relays
Device slots – ![]() Subspace Field Modulator, weapon batteries,
Subspace Field Modulator, weapon batteries, ![]() Deuterium Surplus
Deuterium Surplus
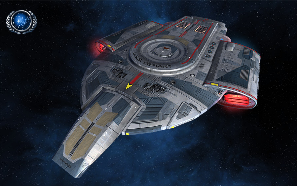
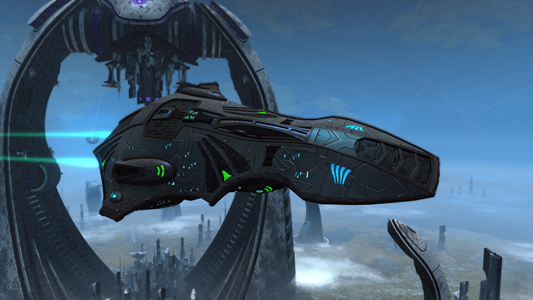
Tier 2 Science Vessel (typical)
Still a very basic (read: limited) setup due to a lack of Bridge Office and Console slots, but some neat combinations are possible nonetheless. Besides the usual healing powers (Eng Tm, Sci Tm and HE) it adds Tractor Beam Repulsors to ‘push’ multiple enemies away, which also does damage slap-bang straight to their hull. The two Particle Generators boost this uppercut to which NPCs have little defense. In addition TBR also destroys heavy destructible torpedoes and can damage if not outright kill enemy fighters/shuttles.
Weapons 2/2 – 2/2 ![]() Polaron beam arrays (have a power drain proc, making targets weaker)
Polaron beam arrays (have a power drain proc, making targets weaker)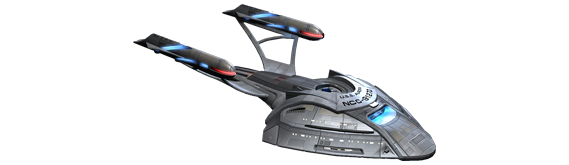
Bridge Officers
![]() ENS Tac –
ENS Tac – ![]() Tactical Team I
Tactical Team I
![]() ENS Eng –
ENS Eng – ![]() Engineering Team I
Engineering Team I
![]() ENS Sci –
ENS Sci – ![]() Science Team I
Science Team I
![]() LTN Sci –
LTN Sci – ![]() Hazard Emitters I,
Hazard Emitters I, ![]() Tractor Beam Repulsors I
Tractor Beam Repulsors I
Consoles
1 Eng – ![]() Neutronium Armor
Neutronium Armor
2 Sci – 2 ![]() Particle Generators (+Exotic Damage: TBR ‘push’ does more damage and is your main weapon)
Particle Generators (+Exotic Damage: TBR ‘push’ does more damage and is your main weapon)
1 Tac – ![]() Polaron Phase Modulator
Polaron Phase Modulator
Device slots – ![]() Subspace Field Modulator,
Subspace Field Modulator, ![]() Deuterium Surplus, Auxiliary batteries (boosts science abilities)
Deuterium Surplus, Auxiliary batteries (boosts science abilities)
level 30 – Captain (free Tier 4 ship)
Tier 4 Cruiser (typical) – Tank build
A tougher “tanky” build, but with still a focus on damage – because it can. 2 copies of damage dealing EPTW (weapons) can be replaced by 2 EPTS (Shields) if you’re feeling squishy. Just use two similar copies back2back.
weapons 4/3 – all ![]() phaser beam arrays
phaser beam arrays
Bridge officers
![]() LTN Tac –
LTN Tac – ![]() Tactical Team I,
Tactical Team I, ![]() Attack pattern Beta I or
Attack pattern Beta I or ![]() Beam Fire at Will
Beam Fire at Will
![]() LTN Eng –
LTN Eng – ![]() Emergency Pwr to Weapons I
Emergency Pwr to Weapons I
![]() CDR Eng –
CDR Eng – ![]() Engineering Team I,
Engineering Team I, ![]() Emergency Pwr to Weapons II,
Emergency Pwr to Weapons II, ![]() Reverse Shield Polarity I
Reverse Shield Polarity I
![]() LTN Sci –
LTN Sci – ![]() Hazard Emitters I,
Hazard Emitters I, ![]() Science Team II
Science Team II
Consoles
3 Eng – ![]() RCS console (+turn), 2
RCS console (+turn), 2 ![]() Neutronium armor
Neutronium armor
2 Sci – 2 ![]() Shield Emitter Amplifiers
Shield Emitter Amplifiers
2 Tac – 2 ![]() Phaser Relays (or alternate weapon specific)
Phaser Relays (or alternate weapon specific)
Device slots – ![]() Subspace Field Modulator,
Subspace Field Modulator, ![]() Deuterium Surplus, batteries.
Deuterium Surplus, batteries.
Tier 4 Escort (typical)
A hard-hitting little ship that punches above its weight. Fragile though, as its only hull heal is Hazard Emitters. so it’s main defense is agility and speeding out of danger’s reach (10+ km). Hit and run captain !
Wpns 4/2 – 4x ![]() Phaser Dual Heavy Cannons, 2x
Phaser Dual Heavy Cannons, 2x ![]() Phaser turrets
Phaser turrets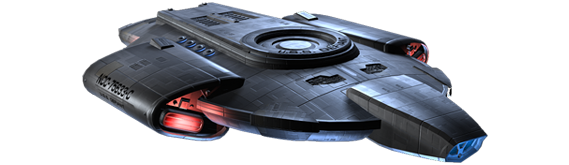
Bridge Officers
![]() CDR Tac –
CDR Tac – ![]() Tactical Team I,
Tactical Team I, ![]() Attack pattern Beta I,
Attack pattern Beta I, ![]() Cannon Rapid Fire
Cannon Rapid Fire
![]() LTN Tac –
LTN Tac – ![]() Tactical Team I,
Tactical Team I, ![]() Cannon Scatter Volley
Cannon Scatter Volley
![]() LTN Eng –
LTN Eng – ![]()
![]() Emergency Power to Weapons I & II
Emergency Power to Weapons I & II
![]() LTN Sci –
LTN Sci – ![]() Hazard Emitters I,
Hazard Emitters I, ![]() Science Team II
Science Team II
Consoles:
2 Eng – 2 ![]() Neutronium Armors
Neutronium Armors
2 Sci – 2 ![]() Shield Emitter Amplifiers
Shield Emitter Amplifiers
3 Tac – 3 ![]() Phaser Relays
Phaser Relays
Device slots – ![]() Subspace Field Modulator,
Subspace Field Modulator, ![]() Deuterium Surplus, batteries
Deuterium Surplus, batteries
Tier 4 Science Vessel (typical) – Control/drain build
Tier 4s provide a more deeper foray into Space Wizardy. This build drains enemy power levels via Polaron weapons and Energy Siphon and uses its gains to boost its own Gravity Well to great effect. Besides that it can support others by casting HE, Eng Tm and Sci Tm on those in need.
Weapons 2/2 – 2/2 ![]() Polaron beam arrays
Polaron beam arrays
Bridge officers
![]() LTN Tac –
LTN Tac – ![]() Tactical Team I,
Tactical Team I, ![]() Attack pattern Beta I or
Attack pattern Beta I or ![]() Beam Fire at Will
Beam Fire at Will
![]() LTN Eng –
LTN Eng – ![]() Engineering Team I,
Engineering Team I, ![]() Reverse Shield Polarity I
Reverse Shield Polarity I
![]() CDR Sci –
CDR Sci – ![]() Polarize Hull I,
Polarize Hull I, ![]() Energy Siphon I,
Energy Siphon I, ![]() Gravity Well I
Gravity Well I
![]() LTN Sci –
LTN Sci – ![]() Hazard Emitters I,
Hazard Emitters I, ![]() Science Team II
Science Team II
Consoles
2 Eng – 2 ![]() Neutronium Armor
Neutronium Armor
3 Sci – ![]() Flow Capacitor (+target power drain),
Flow Capacitor (+target power drain), ![]() Graviton Generator (+push/pull: stronger Grav Well)
Graviton Generator (+push/pull: stronger Grav Well)
2 Tac – 2 ![]() Polaron Phase Modulators
Polaron Phase Modulators
Device slots – ![]() Subspace Field Modulator,
Subspace Field Modulator, ![]() Deuterium Surplus, Aux batteries
Deuterium Surplus, Aux batteries
Level 50 – Vice-Admiral
Congratulations Vice-Admiral, you now have access to “end-game” Tier 5 and Tier 6 ships !
Your will receive your last free ship at level 61, but after that no more freebies for you, you have to buy new ships now. Things just got interesting, so go here for a more in-depth mechanics guide.
What we cannot emphasize enough is that in STO you are NOT bound by the type of starship you can fly. A tactical captain will get the most out of an escort, a science captain from a sci ship, and an engineer can be really tough in a cruiser, but you can mix and match careers and ships as much as you like. A Sci captain in an escort can be devastating and a tac captain in a cruiser can do damage and still ‘tank’. This freedom to choose whatever is what makes STO fun to play.
Remember IDIC – infinite diversity through infinite combination.
Bridge Officers 


Bridge Officers – commonly referred to as Boffs – serve as a large pool for various abilities in space combat, which are a major component to any ship build, and getting the right powers (regardless of the Bridge Officer quality) and using them correctly (timing!) is key.
Regardless of faction, your given starter Bridge Officers have a number of standard powers you can use, but often they lack that particular one you’re after. Luckily you can (re-)train your Boffs to suit your needs. The different Bridge Officer powers (click here for full list) can be purchased as training manuals at Earth Space Dock (the NPC under Admiral Quinns office) for Feds, at the Klingon Academy for KDFs, at Romulan HQ for Romulans but also at both our Fed/KDF 44th Fleet starbases (science deck).
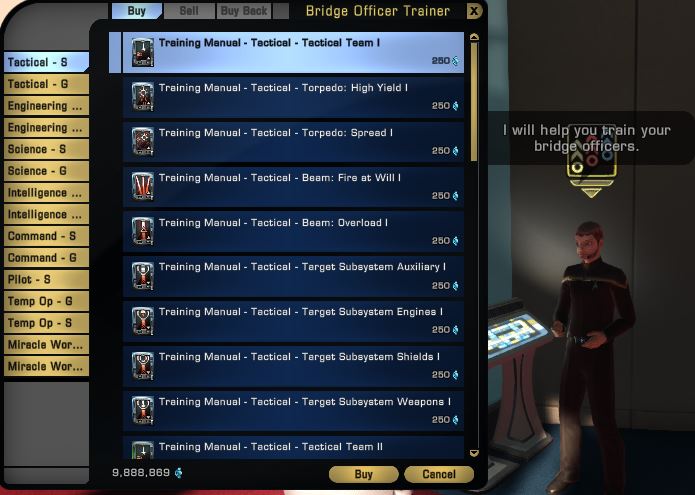
The Boff trainer has all regular training manuals available, for both space, ground and exotic careers like Intelligence and Temporal, which I won’t cover for now. Certain higher rank III powers can only be bought on the exchange, had via a lucky lockbox drop or crafted.
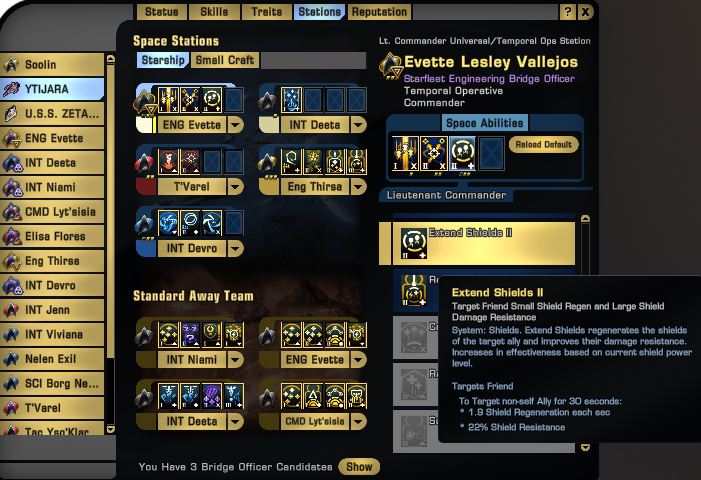
To train a bridge officer simply buy the needed training manual(s), which will then appear in your Inventory (I). In this case I am retraining my Engineer Evette in Extend Shields II, used to support my 5-player team. Once you have a manual, go to your Bridge Officer Roster/skills, and if available you can now Learn. It is possible you have to Promote (right lower corner) your Boff to accept higher ranked training.
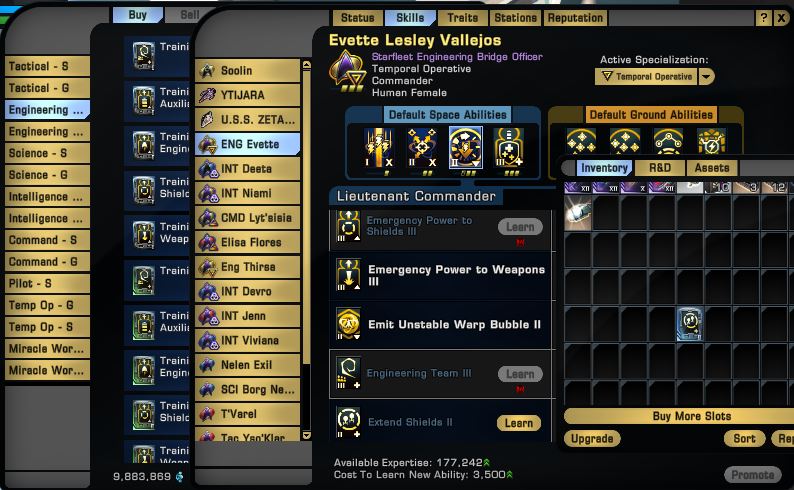
You can now go to your Stations tab and select the new skill to unlock it in your space tray.
This process is identical for other careers and ground powers.
Ship weapons
Each ship comes with common/white equipment, which will NOT do – at all. Ever.
Earliest chance you get discard them as you cannot upgrade or re-engineer them anyway (and selling them gives you precisely 0 credits). When you get the chance replace them with higher blue/purple/gold equipment whenever you can – many episodes and missions reward decent purple weapons.
Weapons output scales so always get the highest Mk level that your rank allows. When you’re level 50 all your weapons should be Purple mk XII minimum, no ifs or buts.
Always stick with one ‘flavor’. It doesn’t really matter which weapon type, but don’t mix Phasers, Tetryons and Plasma weapons on your ship – pick one and use the appropriate tactical consoles as Tac consoles stack and increase your damage output – the more, the better.
Your ship’s power system consists of 200 points than can be distributed over four systems. By default, 50 is put into each, and each has a maximum of 100. Dropping a system below 50 severely reduces its capability, and above 50 can drastically improve it, eg cruisers should have 55+ engine power which increases their turn rate, cannon builds should have 100+ weapon power for best effect. 
Increasing one will decrease the others. You have four presets (Attack/Defense/Speed/Balanced) that you can play with, but your default setting should be Attack.
 Weapons and shield power have a linear relationship, with energy weapons doubling in damage output at 100 power, and shields tripling their recharge rate at 100 power (and they stop recharging completely at 25 power). Again weapon power does not affect torpedoes or mines at all.
You can ‘overcap’ power levels up beyond 125, but that’s for another more in-depth guide. Suffice it to say that your weapon power should be highest for damage, your engine power at 55+ for increased turn. Also you should be consuming the various battery types (“potions”) like a crazed starving tribble.
Boldly go, captain !
Marcase
44th Admiral (Reserve)
Star Trek Online Enterprise Discovery Voyager space combat weapons Kirk Spock phaser photon torpedo beam shuttle star wars MMO RPG boff doff pvp player bridge officer action